First Prototype of a Community Repair Mobile (COREMO) Trailer designed to provide repair services by means of #ASKotec (Access to Skills and Knowledge - open tech emergency case) and other tool-kits/ mobile makerspaces in remote areas with difficult road access. This prototype is currently developed in Kenya)


Difficulté
Facile
Durée
7 jour(s)
Catégories
Machines & Outils, Recyclage & Upcycling, Transport
Coût
500 USD ($)
Sommaire
- 1 Introduction
- 2 Étape 1 - Drafting the metal frame
- 3 Étape 2 - Preparing the parts for the metal frame
- 4 Étape 3 - Welding the metal frame
- 5 Étape 4 - Detail: Building the hitch mechnisim (coupling)
- 6 Étape 5 - Building the side frames
- 7 Étape 6 - Cutting the wooden side panels
- 8 Étape 7 - Detail: Building all connectors for wheels and frames
- 9 Étape 8 - Painting the frame
- 10 Étape 9 - Assembling the frame
- 11 Étape 10 - Attaching the wheels
- 12 Étape 11 - Building the base
- 13 Étape 12 - Finishing the side panels
- 14 Étape 13 - Attaching the trailer
- 15 Notes et références
- 16 Commentaires
Introduction
Repair services of all kinds provided in workshops or other fixed locations are seldom available in remote rural areas of Kenya - as well as many other remote rural areas of the Global South.
People, who are in real need of fixing their limited equipment or finding a solution to a technical problem, are stuck for lack of basic tools and materials.
This is why mobile repair services are not only a great solution, but also one that significantly reduces costs and the use of resources, while allowing people to be active and creative in the repair process.
This step-by-step tutorial serves as an Open Source set of instructions for the prototype of a Community Repair Mobile - COREMO (Trailer Edition) intended for remote areas that are hard to access.
COREMO Trailer will provide remote communities with access to repair services through the use of the #ASKotec (Access to Skills and Knowledge - open tech emergency case) and other mobile makerspaces/tool-kits.
COREMO is currently developed in Kenya by Adam Abdumalik with support from international makerspace community members.
COREMO Trailer serves as a first stage solution for future additional variations, modules and adaptations that will include:
- Use of Solar Power (Soldering, Charging, etc.) through the addition of solar panels
- Solar electric mobility
- Scaling production, decentralized and Open Source implementation
Matériaux
- Bicycle
- Two additional bicycle wheels
- Steel (tubes 20mm)
- Steel plates (1.6mm)
- Flat bar 29mm X 6.35mm
- Welding rods (2.0mm)
- Plywood or metal sheet for the side panels
- Hitch mechanism (coupling)
- Bolts
- Nuts
- Washers
- Axles
- Screws
- Zip ties
- Paint
- Sand paper p100, p80
- Standard thinner
- Toolkit (any)
Outils
- Welding machine
- Welding table
- Tube bender
- Angle grinder
- Vice grips
- Welding pliers
- Welding clamps
- Chipping hammer
- Steel wire brush
- File
- Body filler and spreader
- Drill
- Wrench
- Hand drill
- Jig saw
- Screwdriver
- Paint brush
- Pencil and paper
- Yard stick/ Measuring tape
Étape 1 - Drafting the metal frame
In order to fit the bicycle selected, the frame should match typical sizes of bikes.
Step 1 includes:
- Sketching the size
- Collecting materials
- Measuring all parts
Necessary materials:
- Steel (tubes, plates)
- Bicycle wheels
- Axles
- Bolts, nuts, and washers
- Hitch mechanism (coupling)
- Plywood or metal sheet for the base
- Side panels (if desired)
- Paint
Necessary tools:
- Paper and pencil
- Yard stick
- Angle grinder
- Tube bender
- Measuring tape
- Welding machine
- Hand drill
- Saw
- Wrenches
- Screwdriver

Étape 2 - Preparing the parts for the metal frame
Step 2 includes:
- Measuring to actual sizes
- Cutting the metal to the necessary sizes
- Bending the tubes
Necessary materials:
- Steel (tubes, plates)
Necessary tools:
- Measuring tape
- Saw
- Tube bender


Étape 3 - Welding the metal frame
Step 3 includes:
- Constructing the frame of the trailer using metal /wood. The frame should be sturdy and able to support the weight of the cargo. You can weld metal tubing or use wood planks to create the frame
- Welding together the different parts of the metal frame
Necessary materials:
- Steel (tubes 20mm)
- Steel plates 1.6mm
- Welding rods 2.0mm
Necessary tools:
- Welding machine
- Angle grinder
- Welding table
- Welding pliers
- Welding clamps
- Vice grips
- Chipping hammer
- Steel wire brush
- Hand File / Metal File


Étape 4 - Detail: Building the hitch mechnisim (coupling)
Step 4 includes:
- Building the the connection between the bicycle and the trailer by building a hitch mechanism on the trailer that will attach to your bicycle
- The hitch should be strong and secure to ensure safe towing
Necessary materials:
- Steel tube 25mm
- Steel plates 14g
- Bolts, nuts and washers
Necessary tools:
- Measuring tape
- Hand drill
- Welding machine

Étape 5 - Building the side frames
Step 5 includes:
- Adding side panels to the trailer to contain the cargo and provide additional support. You can use plywood or metal sheets to create the side panels
- Selecting the metals parts needed to build the side frames
- Welding the side frames to the main frame
Necessary materials:
- Steel (tubes, plates)
Necessary tools:
- Welding machine
- Hammer


Étape 6 - Cutting the wooden side panels
Step 6 includes:
- Measuring the size of the wooden panels needed for the metal frame
- Cutting them to the sizes suited for the metal frame
Necessary materials:
- Wooden plates
Necessary tools:
- Angle grinder
- Jig saw
- File
- Yard stick

Étape 7 - Detail: Building all connectors for wheels and frames
Step 7 includes:
- Building the connectors for the wheels, the frames and the strap-connectors: Hitches connector, Coupler, Adopters, Axles
Necessary materials:
- Flat bar 29mm X 6.35mm
- Bolts, washers and nuts
Necessary tools:
- File
- Hand drill
- Wrenches

Étape 8 - Painting the frame
Step 8 includes:
- Painting or sealing the trailer to protect it from deterioration from weather elements
- Alternatively you can also add reflective tape or lights for increased visibility on the road
Necessary materials:
- Paint
- Standard thinner for thinning
- Sand paper p100, p80
- Body filler and spreader
Necessary tools:
- Paint brush 3"
- Spraying machine

Étape 9 - Assembling the frame
Step 9 includes assembling together the frame by fitting together walls, panels and wheels
Necessary tools:
- Wrench
- Hammer


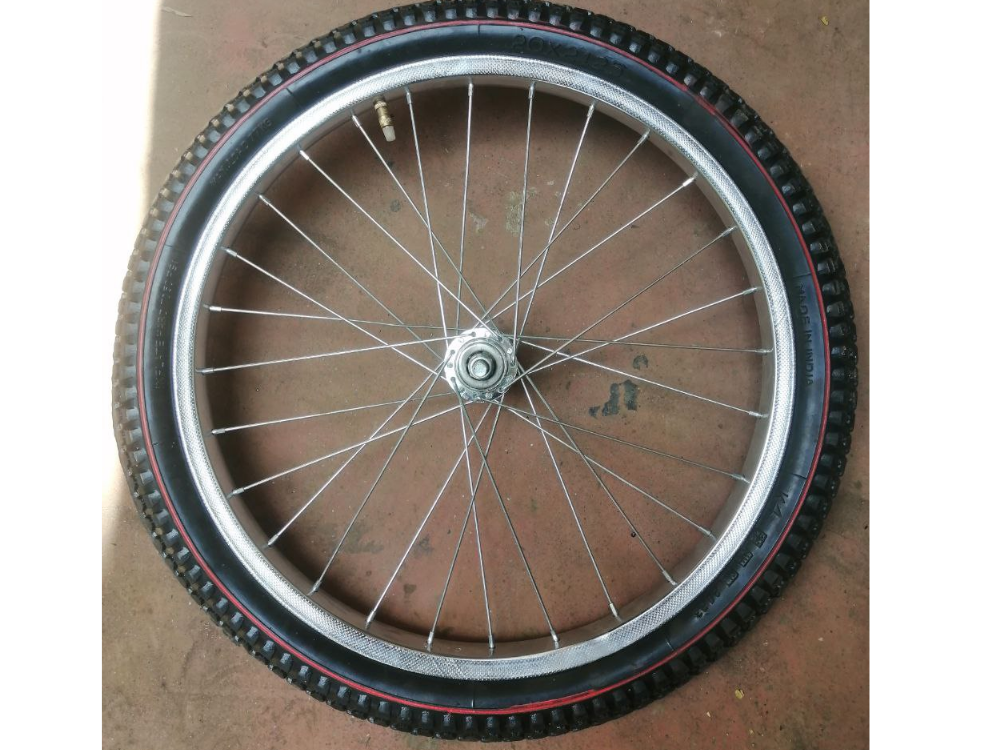
Étape 10 - Attaching the wheels
Step 10 includes:
- Attaching the bicycle wheels to the frame using axles, nuts, and bolts
- Make sure the wheels are securely attached and aligned properly for smooth rolling
Necessary materials :
- 2 additional bicycle wheels
- Bolts
- Nuts
- Washers
Necessary Tools:
- Wrenches
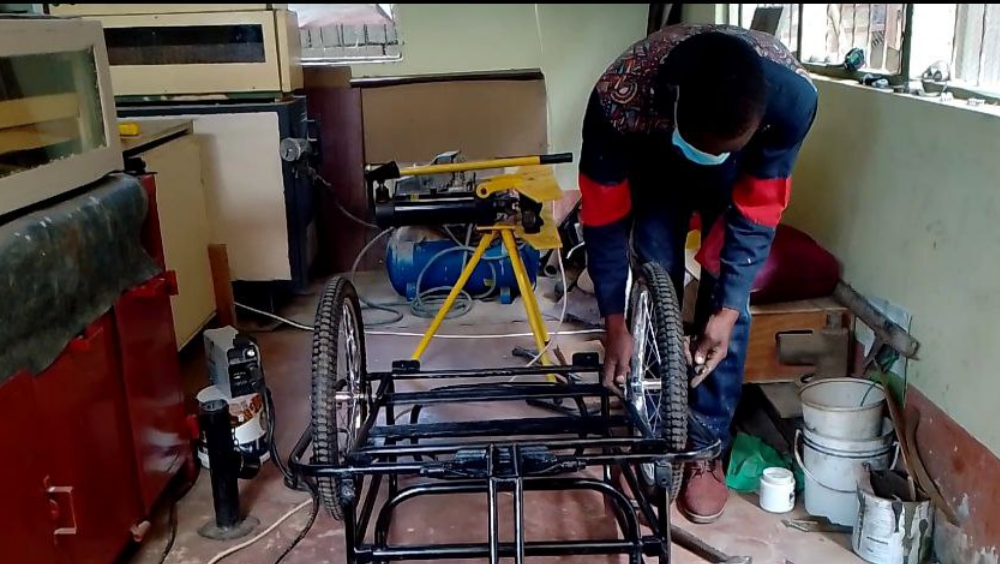
Étape 11 - Building the base
Step 11 includes:
- Building a base for the cargo area using plywood or a metal sheet
- Cutting the base to fit the frame and attach it securely with screws or bolts
Necessary materials :
- Plywood/metal sheet
- Zip ties
- Screws
Necessary tools :
- Screw drivers
- Pliers


Étape 12 - Finishing the side panels
Step 12 includes:
- Painting the side panels to give it some character
- Fixing the panels with zip ties
- Adding your first toolkit (e.g. #ASKotec)
- Making final touches to the frame and trailer
Necessary materials:
- Paint
- Zip ties
Necessary tools:
- Paint brush
- Wrench

Étape 13 - Attaching the trailer
Step 13 includes:
- Attaching the Coupling/hitch mechanism
- Make a test ride: Once the trailer is assembled, test it out to ensure that it rolls smoothly, the hitch attaches securely to your bicycle, and the cargo area is stable
- Enjoy :)
Necessary materials:
- Bolts, nuts and washers
Necessary tools:
- Wrench
- Hammer


Notes et références
Remember to take safety precautions (wear helmets and reflective clothes while using your cargo bike trailer. Ensure that all parts are securely fastened and that the trailer is balanced and stable when loaded with cargo.
Published
 Français
 English
 Deutsch
 Español
 Italiano
 Português